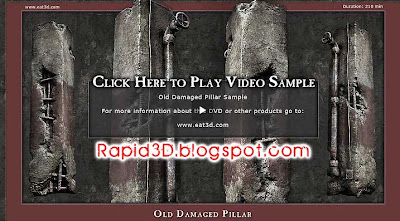
Section 1: Creating the High Poly Meshes
In this demonstration we go through all the steps to get a complete high res model starting from scratch. Starting from a basic box, we go into preparing geometry to take into Mudbox, Sculpting, and then back out into 3dsmax for final touch-ups...
This section includes:
- Blocking out the Basic Forms
- Preparing the Meshes for Mudbox
- Sculpting the Pillar Concrete in Mudbox
- Creating High res rebar and pipes in 3dsmax
- Final Detail Sculpting on all pieces
Duration: 1 hour 20 Minutes
Section 2: Creating the Low Poly Meshes
In this demonstration we go through creating a lowres mesh from a highres mesh. After that we go through both organic and mechanical UV mapping techniques. Then we go through generating the normal maps and other maps we will need for texturing.
This section includes:
- Reusing the high res models to make the low res
- Using PolyCruncher to get a low res Pillar from the Mudbox model
- Pelt Mapping the Pillar and using the relax tool
- Laying out the UVs in a logical order
- Using Render to Texture to get Normal, Diffuse, Ambient Occlusion, and Height maps
- Applying a Metal Bump shader to get an idea of how it will look in game
Duration: 1 hour
Section 3: Texturing and Shaders
In this demonstration we go through creating the texture maps we will use in game. Once the textures are at a good state, we take it all into Unreal and see how it looks. Once the texturing is complete we create a shader in Unreal that can tint the color of the paint, and we also give the Pillar some detail maps. The last thing we cover is placing the Pillar in a simple scene and adding lights and material variations.
What you get:
project files include:
- 1 max file with the final highpoly and lowpoly
- 1 Mudbox file with the final sculpt
- 3 .obj files; for the final low poly mesh,the high poly mesh, and the Mudbox file (useful for other 3d programs)
- 3 2048 PSDs: diffuse-spec-normal
- 2 512 PSDs: channel texture that has the mask and spec tile, and a normal map tile
- 1 unreal upk with the completed asset
- 1 unreal map file with it placed in the scene.
Download Filesize: 1.1 GB
Section 1: Creating the High Poly Meshes
In this demonstration we go through all the steps to get a complete high res model starting from scratch. Starting from a basic box, we go into preparing geometry to take into Mudbox, Sculpting, and then back out into 3dsmax for final touch-ups...
This section includes:
- Blocking out the Basic Forms
- Preparing the Meshes for Mudbox
- Sculpting the Pillar Concrete in Mudbox
- Creating High res rebar and pipes in 3dsmax
- Final Detail Sculpting on all pieces
Duration: 1 hour 20 Minutes
Section 2: Creating the Low Poly Meshes
In this demonstration we go through creating a lowres mesh from a highres mesh. After that we go through both organic and mechanical UV mapping techniques. Then we go through generating the normal maps and other maps we will need for texturing.
This section includes:
- Reusing the high res models to make the low res
- Using PolyCruncher to get a low res Pillar from the Mudbox model
- Pelt Mapping the Pillar and using the relax tool
- Laying out the UVs in a logical order
- Using Render to Texture to get Normal, Diffuse, Ambient Occlusion, and Height maps
- Applying a Metal Bump shader to get an idea of how it will look in game
Duration: 1 hour
Section 3: Texturing and Shaders
In this demonstration we go through creating the texture maps we will use in game. Once the textures are at a good state, we take it all into Unreal and see how it looks. Once the texturing is complete we create a shader in Unreal that can tint the color of the paint, and we also give the Pillar some detail maps. The last thing we cover is placing the Pillar in a simple scene and adding lights and material variations.
This section includes:
- Using our baked maps to start texturing
- Creating a Diffuse, Normal, and Specular map
- Testing the progress in Unreal Editor 3
- Creating a Channel Texture
- Creating a shader to be able to tint the paint
- Adding detail maps to improve the quality
- Placing the models in a scene and adding lights
Duration: 1 hour

Download Links:
http://rapidshare.com/users/VMM1OQ
Source: http://eat3d.com/training_videos/pillar
0 comments:
Post a Comment